source2RSS 是一个通用的信息源转 RSS 的 Python 框架,提供生成 RSS、用户访问 RSS 权限管理、web 界面、分布式抓取、主动发布 RSS 等功能。
如果想获得某个网站的 RSS,只需要为其编写一个抓取器,目前项目有 10 多个抓取器示例,覆盖了较多的场景,可供编写时参考。较为实用的有 B 站 up 动态的 RSS 和 YouTube Channel 的 RSS(比官方多了视频时长,方便筛除短视频)。
另一个比较实用的是主动发布 RSS,提供了 Python 版的客户端(已发布到 PyPI pip install source2RSS_client)。使用上就是向一个 API 发送信息的标题和内容,然后就可以在 RSS 阅读器上等着接收。作者目前将之用在通知程序运行中遇到的非预期的异常。
项目地址: AhFeil/source2RSS: 一个信息源转 RSS 的 Python 框架,专注简化数据抓取后到 RSS 实际可用这一过程 (github.com)
由作者维护的服务提供的 RSS 源有这些: https://rss.vfly2.com/source2rss/ ,并不多,只是作者本人根据需要写的抓取器,如果其中有对你有用的,可以直接订阅。
放个自己的广告,定制 RSS 服务: 定制网站 RSS – 他山测评
| 指标 | 描述 |
|---|---|
| 适用系统 | Debian 系发行版,包括 Ubuntu, Armbian,其他发行版稍改命令一般也可 |
| 走通流程时间 | 20 分钟 |
原生安装 source2RSS
推荐使用普通用户,这里假设用户名为 vfly2,并在家目录下的 pythonServe 放项目工作目录。
前置准备
安装环境和依赖( Python versions 3.11+ )
sudo apt update && sudo apt install python3 python3-venv -y创建目录 /home/vfly2/pythonServe :
mkdir -p ~/pythonServe/ && cd ~/pythonServe/拉取仓库:
git clone https://github.com/AhFeil/source2RSS.git && cd source2RSS运行初始化部署脚本
bash ./setup4host.sh必须在项目安装目录运行脚本,作用:
- 创建虚拟环境和安装包
- 复制示例配置文件到 config_and_data_files 下
- 在安装目录生成 systemd 配置文件,默认将以当前用户身份运行程序
如果出现 "Host system is missing dependencies to run browsers. Please install them with the following command:",就按照提示安装依赖:sudo .env/bin/playwright install-deps。
下面是主体的流程,分布式抓取涉及到的 agent 的流程在 agent 一节
配置
根据注释自定义(用户级)配置文件
cd ~/pythonServe/source2RSS && vim config_and_data_files/config.yaml配置文件内容较多,详细说明可以前往 https://github.com/AhFeil/source2RSS/blob/main/docs/config.md 查看。
pgm_config.yaml 是程序级的配置文件,一般不必修改
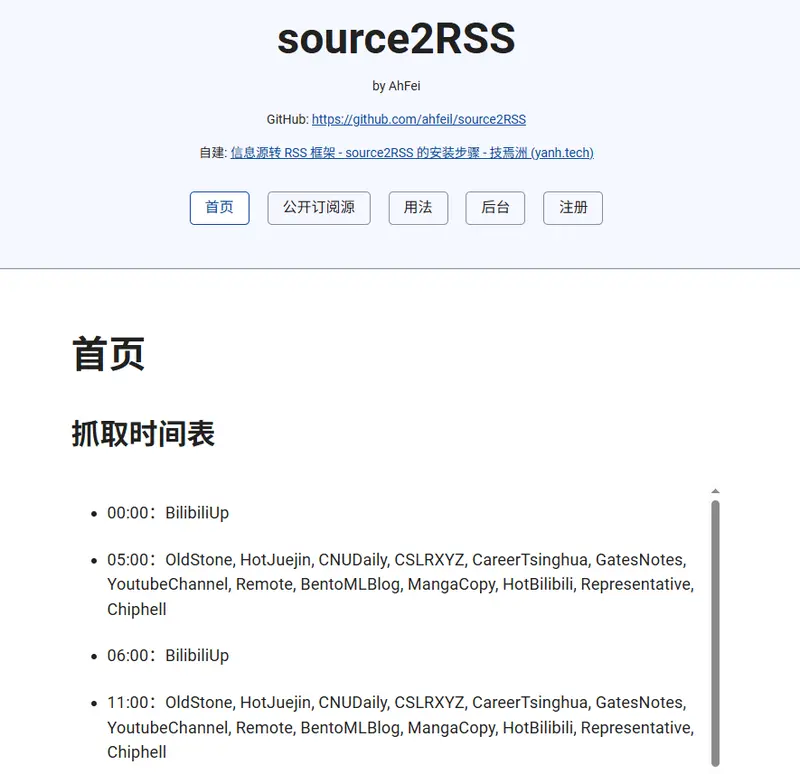
先运行一下,测试主程序是否能正常运行(访问 http://ip:8536/ 查看主页)
.env/bin/uvicorn main:app --host 0.0.0.0 --port 8536使用 Systemd 守护进程
setup4host.sh 已经生成了 Systemd 的配置文件,可以看一下 ,一般无须修改
cat source2RSS.service开机自启并立即运行
sudo systemctl enable --now $PWD/source2RSS.service查看状态
sudo systemctl status source2RSS.service如有修改 Systemd 的配置文件,使用下面命令刷新
sudo systemctl daemon-reload方便用户使用
sudo systemctl stop source2RSS.service
sudo systemctl start source2RSS.service
sudo systemctl disable source2RSS.service   # 关闭开机自启
Nginx 反代
本节不是必须要做的,可以跳过。
使用 acme.sh 自动获取和更新证书: [[02acme.sh]] 使用 acme.sh 申请和自动更新证书的完整指南 – 技焉洲
记得修改域名
acme.sh --issue -d rss.vfly2.com --webroot /var/www/htmlacme.sh --install-cert -d rss.vfly2.com \
--key-file /etc/ssl/private/rss.vfly2.com.key \
--fullchain-file /etc/ssl/certs/rss.vfly2.com.cer \
--reloadcmd "systemctl reload nginx"可以查看一下示例中的 Nginx 的配置文件,一般无须改什么
cd ~/pythonServe/source2RSS && cat examples/source2RSS.conf修改域名并生成临时文件,修改 DOMAIN="rss.yanh.tech" 中的域名,然后执行命令:
DOMAIN="rss.yanh.tech" && sed "s/rss\.vfly2\.com/${DOMAIN}/g" examples/source2RSS.conf > /tmp/source2RSS_temp用 sudo 将配置文件移动到 Nginx 的站点目录下,并启用站点配置
sudo mv /tmp/source2RSS_temp /etc/nginx/sites-available/source2RSS && \
sudo ln -s /etc/nginx/sites-available/source2RSS /etc/nginx/sites-enabled/source2RSS
检查配置并重启生效
sudo nginx -t && sudo systemctl reload nginx分布式抓取
如果只用单机,不需要分布式抓取功能,可以忽略此节。
安装过程和前面的一样,不过 agent 有其自己的配置文件,且目前还需要设置主程序的配置文件才行。
根据注释自定义(用户级)配置文件
cd ~/pythonServe/source2RSS && vim config_and_data_files/agent_config.yaml可以看一下 Systemd 的配置文件,一般无须修改
cat source2RSS_d_agent.service开机自启并立即运行
sudo systemctl enable --now $PWD/source2RSS_d_agent.service查看状态
sudo systemctl status source2RSS_d_agent.service如有修改 Systemd 的配置文件,使用下面命令刷新
sudo systemctl daemon-reload方便用户使用
sudo systemctl stop source2RSS_d_agent.service
sudo systemctl start source2RSS_d_agent.service
sudo systemctl disable source2RSS_d_agent.service
维护
更新
先停止运行
sudo systemctl stop source2RSS.service && cd ~/pythonServe/source2RSS在工作目录下,用 Git 拉取最新版本:
git pull如果包需要更新,运行下面命令,会进行更新
bash ./setup4host.sh配置文件也可能需要更新,这个只能手动更新
然后重启(如果报错,可能添加了依赖库,或者更改了配置文件格式,推荐删除目录重装)
sudo systemctl start source2RSS.service
sleep 3
sudo systemctl status source2RSS.service
查看日志
journalctl -u source2RSS -n 50
journalctl -u source2RSS -f --since "5 minutes ago"
journalctl -u source2RSS -f --since "8 hours ago"
journalctl -u source2RSS --since "7 day ago" | grep "483246073"
更新 agent
先停止运行
sudo systemctl stop source2RSS_d_agent.service && cd ~/pythonServe/source2RSS在工作目录下,用 Git 拉取最新版本:
git pull如有包、配置文件更新,则需要更新
然后重启
sudo systemctl start source2RSS_d_agent.service
sleep 3
sudo systemctl status source2RSS_d_agent.service
查看日志
journalctl -u source2RSS_d_agent -f --since "5 minutes ago"
journalctl -u source2RSS_d_agent --since "7 day ago" | grep "483246073"
迁移
复制 config_and_data_files 目录即可
卸载
停止运行并关闭开机自启,然后删除安装目录即可
原文链接: https://yanh.tech/2024/07/deployment-process-for-source2rss/
版权声明:本博客所有文章除特別声明外,均为 AhFei 原创,采用 CC BY-NC-SA 4.0 许可协议。转载请注明来源 技焉洲 (yanh.tech) 。
保持更新 ٩(•̤̀ᵕ•̤́๑)ᵒᵏᵎᵎᵎᵎ 清晰恒益的实用技能,欢迎使用 RSS 订阅,如果能留言互动就更好了。
可在 Telegram 群组 https://t.me/vfly2 交流依文章步骤遇到的问题。