本文重在 ScreeGo 的部署流程,更多远程桌面共享方案可查看:4 种最佳的远程桌面 – 技焉洲
| 指标 | 描述 |
|---|---|
| 适用系统 | Debian 系发行版,包括 Ubuntu, Armbian,其他发行版稍改命令一般也可 |
| 走通流程时间 | 15 分钟 |
I might have made some mistakes, please let me know if I’ve gotten anything wrong!
下面是在电脑共享,在手机浏览器查看的效果:

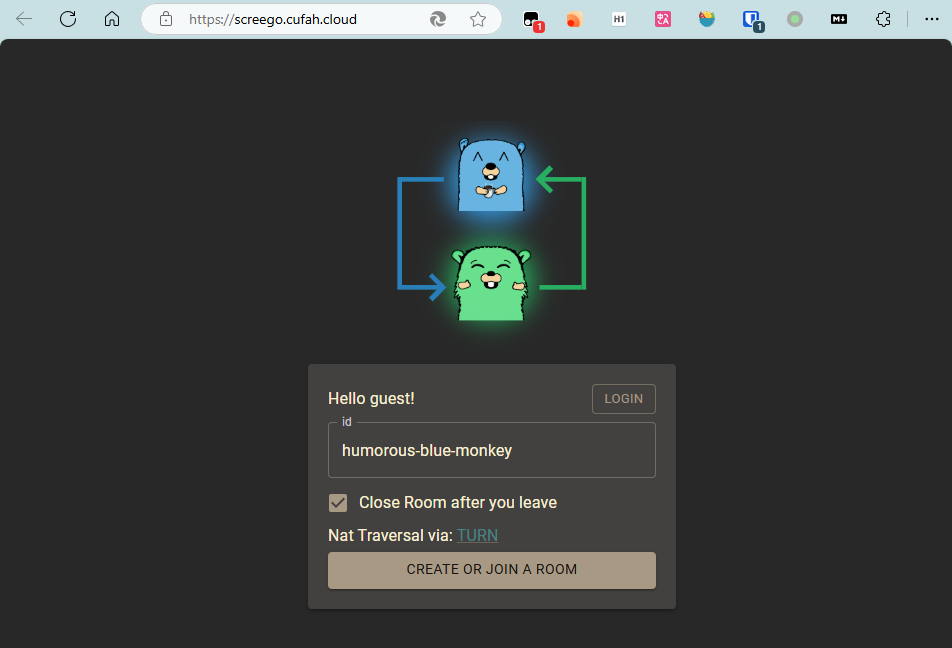
ScreeGo 提供了一种简单快捷的屏幕共享方式,使用现代浏览器,如 Chrome、Edge 就能将本地电脑的画面分享出去,其他人使用浏览器就能看到桌面,无须安装额外软件,并且利用 WebRTC 技术,端到端直连确保低延迟和高清画质。
很适合给朋友演示一些软件的安装、配置等流程,发给他一个网址就能看见你的操作。
GitHub: screego/server: screen sharing for developers https://screego.net/
通观全局
screego 是一个 Go 编写的单文件程序,screego.config 保存配置文件。仅此 2 个文件,一目了然:
/usr/local/bin/screego
/usr/local/bin/screego.config
必须使用 TLS,因此需要域名和申请证书,本文提供了相应的教程。
另外,WebRTC 的通信方式造成了当多个人观看你的桌面时,你本机的 CPU 占用率会很高。原因为:当双方进行 WebRTC 握手时,他们会选择各自支持的编解码器。这意味着如果视频流式传输到支持不同编解码器的多个对等点,则浏览器必须使用不同的编解码器对其进行多次编码。
下载与安装
官方文档: https://screego.net/#/install
由于是 Go 开发,就单个二进制文件,没必要用 Docker 容器安装运行
复制全部内容,粘贴到终端执行
github_project="screego/server"
stable_release_or_pre='releases/latest'

arch=$(uname -m)
if [[ $arch == "aarch64" ]]; then ARCH="arm64"
elif [[ $arch == "x86_64" ]]; then ARCH="amd64"
else echo "Unknown architecture: $arch"; exit 1
fi

tag=$(curl -m 10 -sL "https://api.github.com/repos/${github_project}/${stable_release_or_pre}" | grep "tag_name" | head -n 1 | awk -F ":" '{print $2}' | sed 's/\"//g;s/,//g;s/ //g')
echo "going to download version ${tag}"

# 下载与解压
curl -L -O https://github.com/${github_project}/releases/download/${tag}/screego_${tag#v}_linux_${ARCH}.tar.gz
mkdir -p temp_screego && tar -zxvf screego_${tag#v}_linux_${ARCH}.tar.gz -C temp_screego/
mv temp_screego/screego ./
rm -r temp_screego && rm -f ./screego_${tag#v}_linux_${ARCH}.tar.gz
移动到执行文件惯例目录下
sudo mv ./screego /usr/local/bin/填写配置文件
配置说明: https://screego.net/#/config
- 需要机器的 IP ,可以用
curl 'https://api.ipify.org'查看,动态 IP 则使用域名 - 需要域名
sudo vim /usr/local/bin/screego.config按含义自行修改
# 公网地址
SCREEGO_EXTERNAL_IP=23.165.248.239,2602:fce1:45a:132::a
SCREEGO_CORS_ALLOWED_ORIGINS=https://screego.cufah.cloud
# 密钥,用于 cookie 验证
SCREEGO_SECRET=6jznQgDzpFNQ4EZuq
# 本文选择自身不开启 TLS,而是借助 Nginx
SCREEGO_SERVER_TLS=false
# 网页的监听地址,这里要使用 Nginx 反代,因此用 127.0.0.1
SCREEGO_SERVER_ADDRESS=127.0.0.1:5050
# TURN 功能监听的地址
SCREEGO_TURN_ADDRESS=0.0.0.0:3478
# Nginx 反代时必须填 true,并且 Nginx 要使用 X-Real-Ip
SCREEGO_TRUST_PROXY_HEADERS=true

# 验证方式:
#   all: User login is always required
#   turn: User login is required for TURN connections
#   none: User login is never required
SCREEGO_AUTH_MODE=none
# 上面验证方式为 none,因此用户文件路径空着即可(the location of the users file)
# File Format:
#   user1:bcrypt_password_hash
#   user2:bcrypt_password_hash
# Example:
#   user1:$2a$12$WEfYCnWGk0PDzbATLTNiTuoZ7e/43v6DM/h7arOnPU6qEtFG.kZQy
#
# The user password pair can be created via
#   screego hash --name "user1" --pass "your password"
SCREEGO_USERS_FILE=
Nginx 反代
将域名解析指向机器 IP,通过 acme.sh 申请证书,若不了解先看此文: [[02acme.sh]] 使用 acme.sh 申请和自动更新证书的完整指南 – 技焉洲
sudo -i以下的域名记得修改
acme.sh --issue -d screego.cufah.cloud --webroot /var/www/htmlacme.sh --install-cert -d screego.cufah.cloud \
--key-file /etc/ssl/private/screego.cufah.cloud.key \
--fullchain-file /etc/ssl/certs/screego.cufah.cloud.cer \
--reloadcmd "systemctl reload nginx"sudo vim /etc/nginx/sites-available/screegoupstream screego {
server 127.0.0.1:5050;
}
server {
listen 80;
server_name screego.cufah.cloud;
location /.well-known/acme-challenge/ {
root /var/www/html;
}
location / {
return 301 https://screego.cufah.cloud$request_uri;
}
}
server {
listen 443 ssl;
server_name screego.cufah.cloud;
ssl_certificate /etc/ssl/certs/screego.cufah.cloud.cer;
ssl_certificate_key /etc/ssl/private/screego.cufah.cloud.key;
location /.well-known/acme-challenge/ {
root /var/www/html;
}
location / {
proxy_pass http://screego;
proxy_set_header Host $host;
proxy_set_header X-Real-IP $remote_addr;
proxy_set_header X-Forwarded-For $proxy_add_x_forwarded_for;
proxy_set_header REMOTE-HOST $remote_addr;
proxy_set_header X-Forwarded-Proto $scheme;
# WebSocket-specific headers
proxy_http_version 1.1;
proxy_set_header Upgrade $http_upgrade;
proxy_set_header Connection "upgrade";
}
}sudo ln -s /etc/nginx/sites-available/screego /etc/nginx/sites-enabled/screego检查配置
sudo nginx -t重启生效
sudo systemctl reload nginx查看效果
screego serve在浏览器访问网址

Systemd 守护进程
创建服务文件
sudo vim /etc/systemd/system/screego.service下面假设用户是 vfly2。记得修改 User、Group:
[Unit]
Description=screego service
Wants=network-online.target
After=network-online.target nss-lookup.target

[Service]
Type=simple
User=vfly2
Group=vfly2
ExecStart=/usr/local/bin/screego serve
Restart=on-failure
SyslogIdentifier=screego

[Install]
WantedBy=multi-user.target
重新加载
sudo systemctl daemon-reload运行开机自启,并立即运行
sudo systemctl enable --now screego.service查看状态
sudo systemctl status screego.servicesudo systemctl start screego.servicesudo systemctl stop screego.service原文链接: https://yanh.tech/2024/11/screego-installation/
版权声明:本博客所有文章除特別声明外,均为 AhFei 原创,采用 CC BY-NC-SA 4.0 许可协议。转载请注明来源 技焉洲 (yanh.tech) 。
保持更新 ٩(•̤̀ᵕ•̤́๑)ᵒᵏᵎᵎᵎᵎ 清晰恒益的实用技能,欢迎使用 RSS 订阅,如果能留言互动就更好了。
可在 Telegram 群组 https://t.me/vfly2 交流依文章步骤遇到的问题。


